Self Covered Buttons Made Easy
 We saw the contestants of the Great British Sewing Bee tackling these nifty buttons, some of whom had a little difficulty. So here are my tips for simple success.
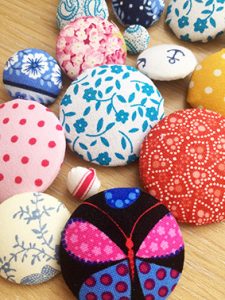
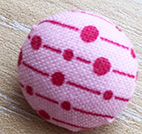
I just love self covered buttons, they come in various sizes and mean that you can match a button to your latest project without having to scour the shops or search on line for just the right one! You can choose which fabric to cover the button base with, from matching to contrast, and you can ‘fussy’ cut the fabric so that a particular part of the fabric design is featured on the top.

Button Making Tool
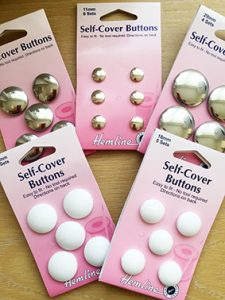
Button Packs
Self covered buttons come in different sizes in both metal or plastic. They are shank buttons (so no buttonholes). I prefer the plastic variety as they are easier to assemble and don’t need the button making tool. But if you want to use the metal ones, then do get the tool to go with them. You will also need a hammer to help secure the metal buttons.
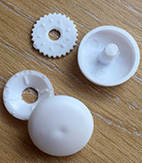 The buttons have two parts, a domed front and a flat back with serrated edge. One side of the back has little ‘bumps’, this is the side that goes against the fabric so it helps grip the fabric in place.
 To make up
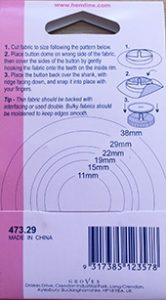
- First cut out the template from the back of the package which corresponds to the size of the button you are making. Place it on the fabric and cut out.
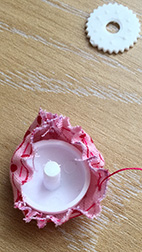
- Hand stitch a running stitch around the outside of the fabric circle about 3mm from the edge, anchoring the stitch at the beginning so you can pull it up.
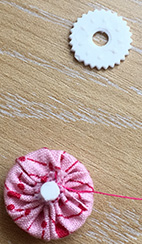
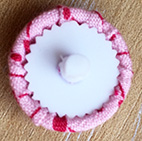
- Place the dome of the button inside the circle, fabric is right side out and the dome is against the inside. Pull up the gathers to fit the fabric around the dome tightly and then, with the bumpy side down towards the gathers, cover the gathered fabric with the back pushing it in place firmly. Button done!
- If using the metal variety of button, this is easier to do with the button making tool. Place the button in the right size hole (the tool has different sizes for the different size buttons). Place the rubber cap on top and then hit it with a hammer.
TIP: If you are using a lightweight fabric, first interface it so that the fabric is more stable and the button base will not show through.
 Going the extra mile!
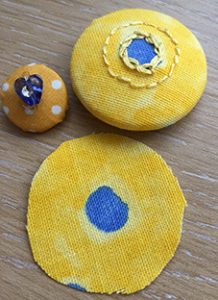
Not only can you ‘fussy’ cut the fabric, you can add embroidery stitches or beading to really make your buttons stand out.
Further information
I have done two video clips for both the Hemline Plastic self covered buttons and the metal variety so take a look for an easy tutorial on creating your very own self covered buttons with confidence.